
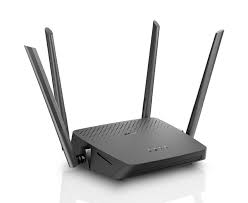
DLink WiFi extender is the ultimate device that extends the range of existing WiFi network to far corners of your house. But, to make the most out of your extender, you have to set it up correctly. What happened? Don’t know how to set up DLink WiFi extender? Do not worry! We have got you covered! In this piece of writing, we will provide you complete instructions following which setting up D Link extender will be a walk in the park for you. Let’s get the ball rolling!
Set Up DLink Extender: Using 2 Easy Methods
There are two ways through which you can set up DLink WiFi extender:
- First, is using the manual method
- Second, is using the WPS method
In this article, we have discussed both the method to set up the extender. First, we have provided instruction to set up the device using manual method.
Set Up DLink Extender: Manual Method
The instructions to set up DLink WiFi extender using the manual method are provided below:
Step 1: To set up DLink WiFi extender, the first step is to find a wall socket for your device (the extender) closer to your internet router. Once you find it, plug the extender in and wait for its power LED to get stable.
On the off chance, you don’t have the power socket closer to your router, for your extender to plug it in, use an extension cord (recommended).
Step 2: Once you have plugged in your DLink extender and router closer and turned it (the extender) on, grab an Ethernet cable and insert one end into the Ethernet port of your extender and the other end into one of the ports of your router.
What happened? You have placed your WiFi extender and router closer still you are still unable to connect them via Ethernet cable. Why? The reason is that they are placed closer, but plugged in two different walls on the opposite side. No worries! For making an Ethernet connection between the two (extender and router), you have to place them pretty close.
Step 3: Once you are done making a router-extender connection, you need to turn on a computer or laptop and open a web browser of your choice in it.
Keep in mind, the web browser you have opened shouldn’t be outdated. Have a quick check at the web browser. If you find it outdated, update it right away, clear the browsing history, and restart your client device (computer or laptop).
Step 4: In the address bar of your web browser, enter dlink.local without committing typing errors, and press the Enter key.
Copy dlink.local and paste (suggested) in the browser’s URL bar. Why? If you do so, you will enter the DLink WiFi extender default web address correctly.
Step 5: Upon hitting the Enter key, you will find yourself on the DLink WiFi extender login window. Here, you have to provided the default admin credentials of your device (range extender) into the required fields, and click Login, LOGIN, or Log In.
“Log in” Options may vary.
Step 6: DLink extender setup page will be displayed. Now, you can see a set of instructions has been displayed. From here, read the setup instructions and then apply them in the exact given order to complete the DLink WiFi extender setup process without hindrance.
In this manner, you can set up DLink WiFi extender using the manual method. Just in case, you don’t want to use the manual instructions to set up your range extender or you find it difficult to place your extender and router closer and connect them via Ethernet source, straightaway opt for the WPS method).
Set Up DLink Extender: WPS Method
The instructions to set up DLink WiFi extender using the WPS method are provided below. In this method, keep your devices plugged in where they are (on two different walls opposite to each other):
Step 1: Ensuring a constant power supply to your DLink WiFi extender and router, locate and press the WPS button on your host router first.
Step 2: Did you press the WPS button on your router? Yes? Now, press the WPS button on your DLink WiFi extender.
In this way, the DLink WiFi extender setup process can be completed using the WPS method. You can now enjoy seamless internet connectivity throughout your house without signal drop.